Knowledge
How to Set Up Your Hexagonal Aluminum Canopy Tent?

Jul
Setting up a pop-up canopy tent is a straightforward process if you follow the correct steps. This guide is applicable for 10×10, 10×15, and 10×20 hexagonal aluminum frame pop-up tents. Ensure you have enough space and a flat surface to begin the setup. Here’s a step-by-step tutorial to help you through the process.
Step 1: Unpack the Tent Frame
- Remove the Tent Frame from the Carry Bag: Start by taking the aluminum frame out of its storage bag. Be sure to do this gently to avoid any damage.
- Remove Any Securing Straps: Check the frame for any straps or ties that may be holding it together and remove them. This will allow the frame to expand freely.
Step 2: Position the Frame
- Stand the Frame Upright: Place the tent frame in an upright position on a spacious and flat surface. Ensure the area is free of obstacles that might hinder the setup process.
Step 3: Partially Open the Tent Frame
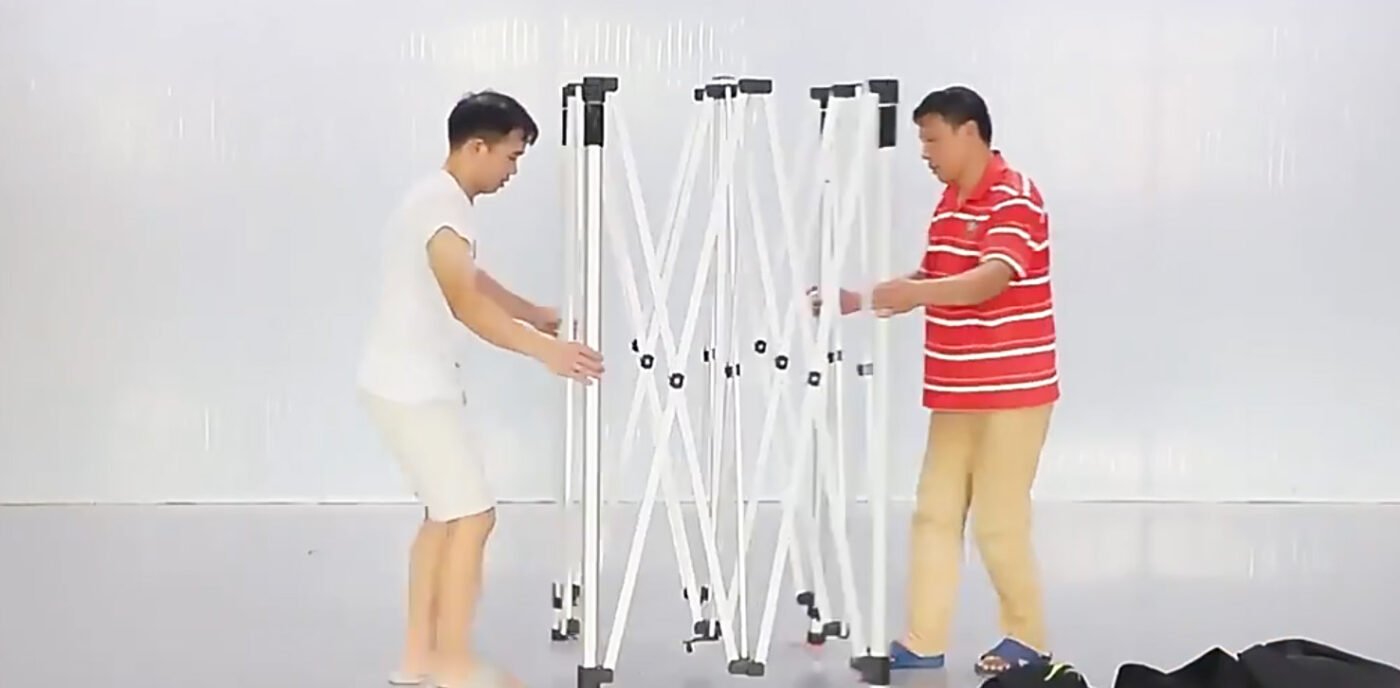
- Partially Expand the Frame: Begin to pull the frame apart, expanding it partially. It should be stable enough to stand on its own but not fully extended. This makes it easier to position the canopy.
Step 4: Attach the Canopy

- Position the Canopy Over the Frame: Place the canopy over the top of the partially opened frame.
- Align the Velcro Straps: Each corner of the canopy is equipped with Velcro straps. Align these straps with the corresponding corners of the frame and secure them. This ensures that the canopy is correctly positioned and will stay in place as you expand the frame.
Step 5: Fully Expand the Frame
- Expand the Tent Frame Completely: With the canopy secured, continue to pull the frame apart until it is fully extended. This might require assistance to ensure an even expansion.
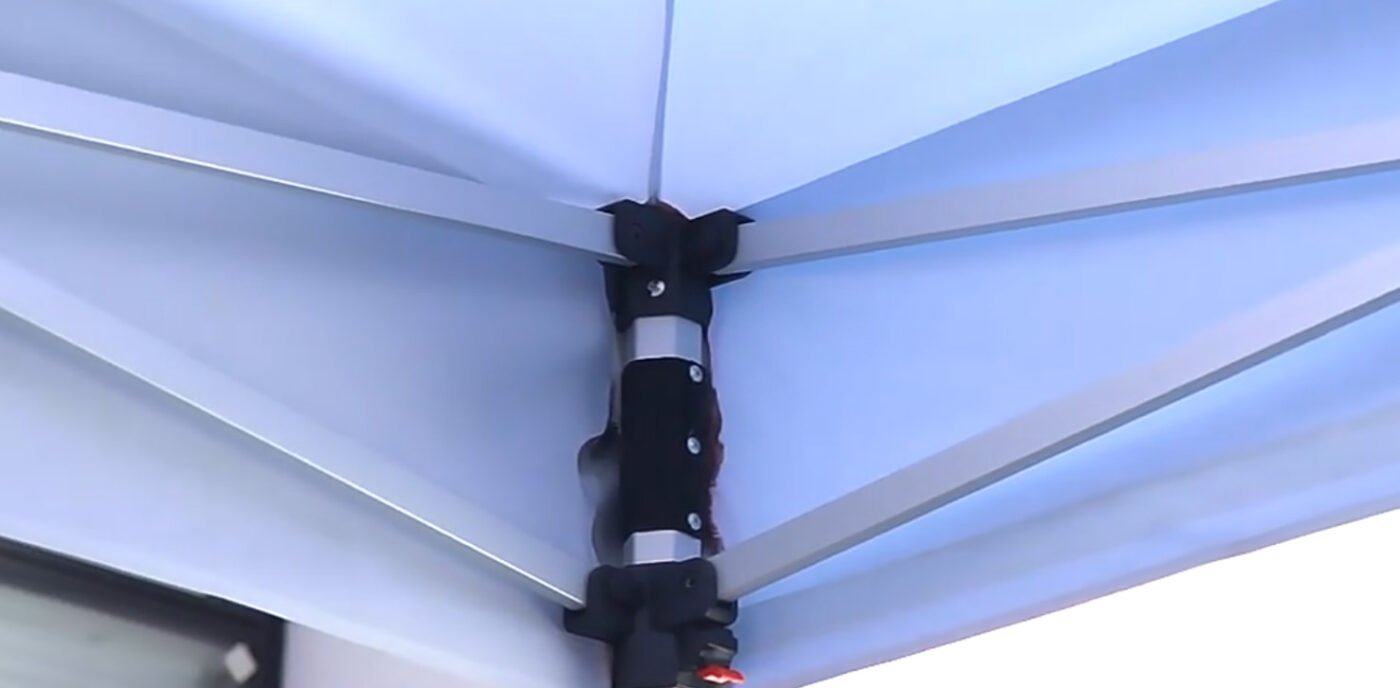
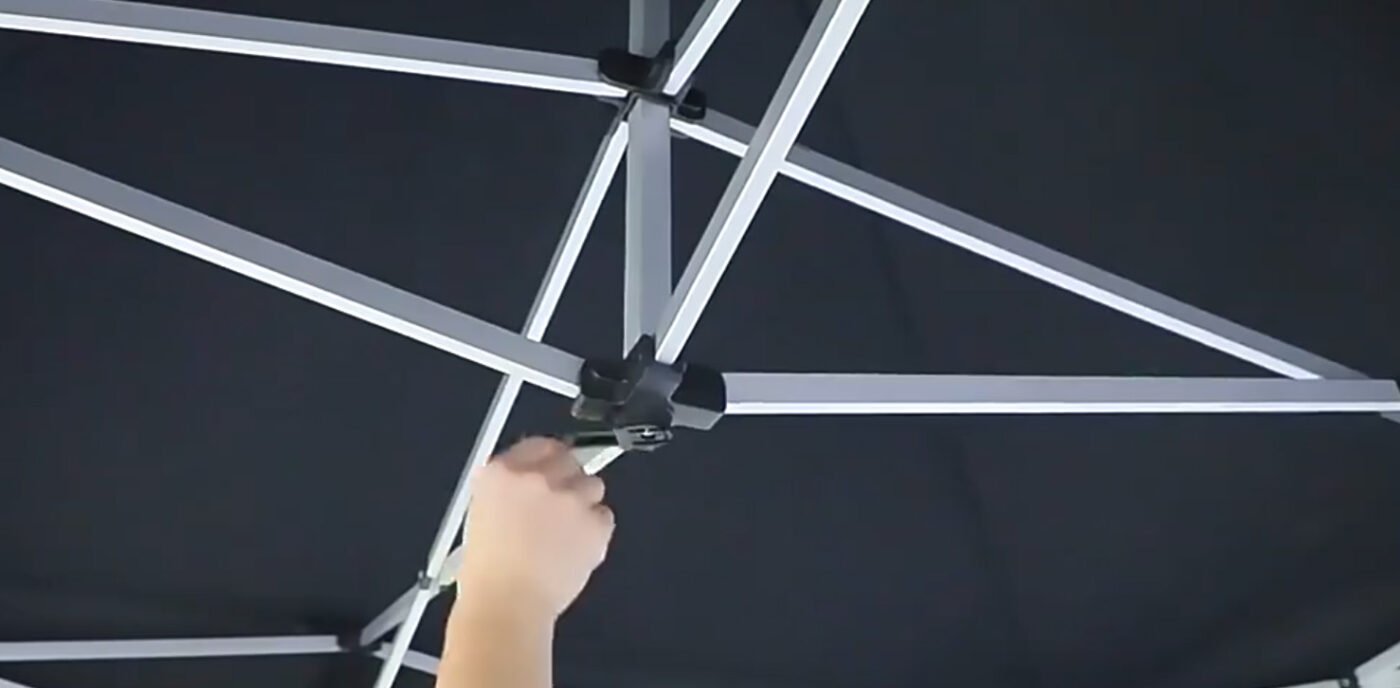
- Secure the Corner Brackets: Once fully extended, lock the corner brackets in place. This will stabilize the frame and keep it from collapsing.
Step 6: Raise the Canopy’s Peak
- Lift the Peak: Raise the center peak of the canopy by pushing up on the central mechanism. This action should raise the roof of the tent, giving it its final shape.
Step 7: Adjust the Height

- Set the Leg Height: Each leg of the tent is adjustable. Starting with one leg, extend it to your desired height and lock it in place. Repeat this process for each leg, ensuring the tent is level and stable.
Step 8: Secure Each Tent Leg with Weights
Finally, secure each tent leg with the provided weights. These weights are essential for preventing the tent from tipping or being blown away by wind. Attach the weights to the base of each leg, ensuring they are firmly in place.
This step is particularly important for outdoor setups where wind conditions can be unpredictable.
Final Checks
- Secure All Velcro Straps: Go around the tent and ensure all Velcro straps are securely fastened.
- Inspect for Stability: Check that all brackets and locking mechanisms are properly engaged.
- Adjust as Necessary: Make any final adjustments to the height or positioning of the tent to ensure it is stable and ready for use.
By following these detailed steps, you should have your hexagonal aluminum frame pop-up tent set up quickly and efficiently. Enjoy your newly set up canopy tent for any outdoor event or gathering!