Kennis
Stapsgewijze installatiehandleiding voor de veervlag

Mar
Feather flags have become a staple in outdoor advertising and event decorations. They are not only eye-catching but also relatively easy to set up. Whether you’re preparing for a business event, a trade show, or a personal celebration, setting up a feather flag correctly is crucial for maximum visibility and longevity. In this guide, we’ll walk you through the process step-by-step.
Understanding Your Feather Flag Kit

Before diving into the setup process, it’s essential to familiarize yourself with the components of your feather flag kit. Typically, a feather flag kit includes the flag itself, a pole system, and a base or stand. Depending on the kit, you might also have additional accessories like ground stakes or water weights for extra stability.
Preparing for Setup
The first step is to choose an appropriate location. Ideally, your feather flag should be in a high-traffic area with maximum visibility.
Ensure there are no obstructions like trees or buildings that might hinder its visibility. Also, consider the direction of the wind; feather flags look best and last longer when they flutter naturally with the breeze.
Assembling the Pole System
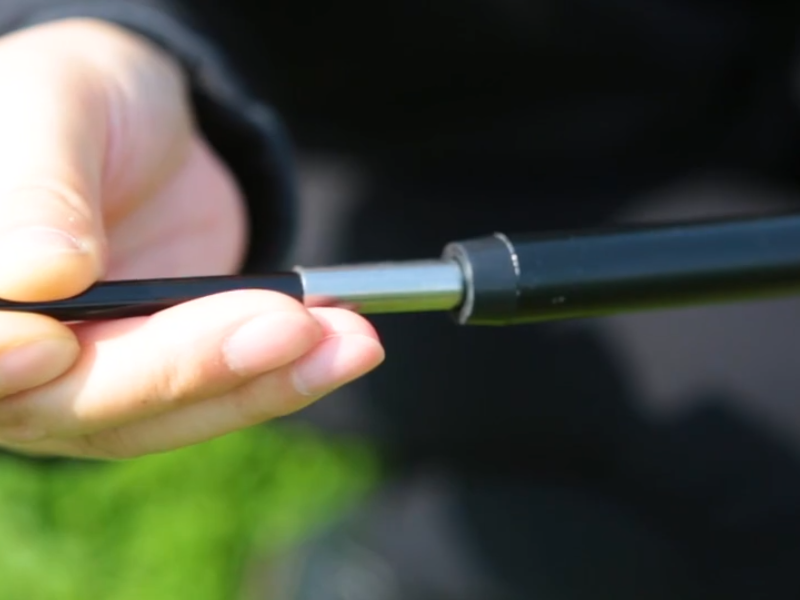
Start by laying out all the pole segments and connect them.
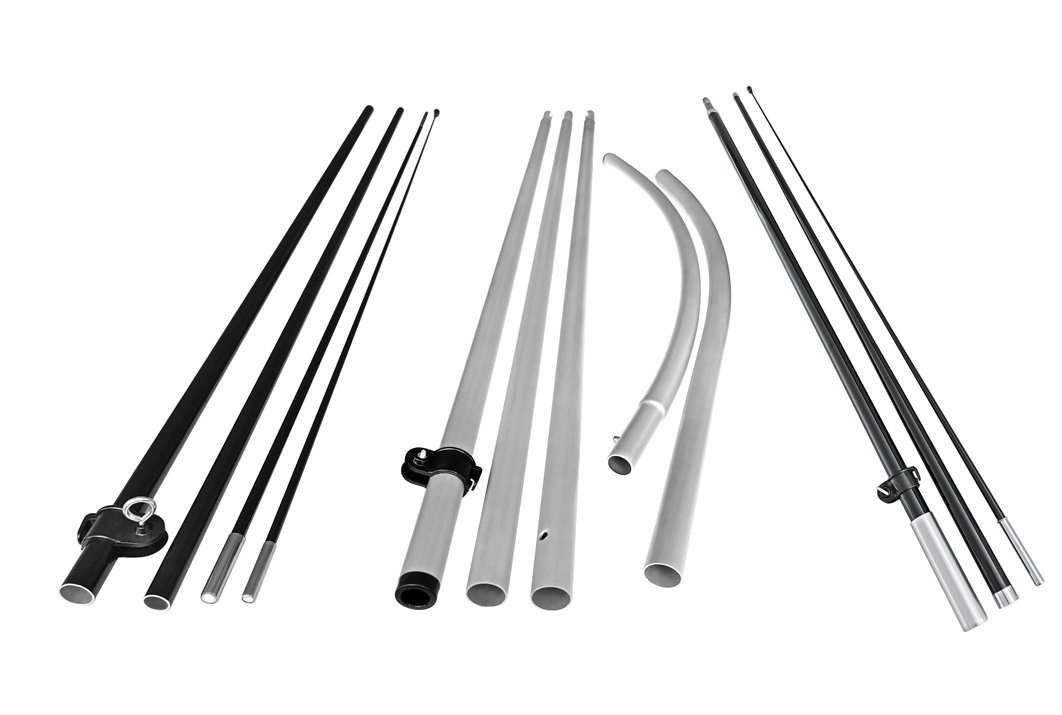
Most feather flag poles are nested, meaning they fit into each other from largest to smallest. Ensure each segment is securely connected to provide a sturdy structure for your flag.
Choosing the Right Base
Select a base that suits your location. Ground stakes are perfect for outdoor, soft ground settings like grass or soil. If you’re setting up on a hard surface, use a cross base or water weight for stability.
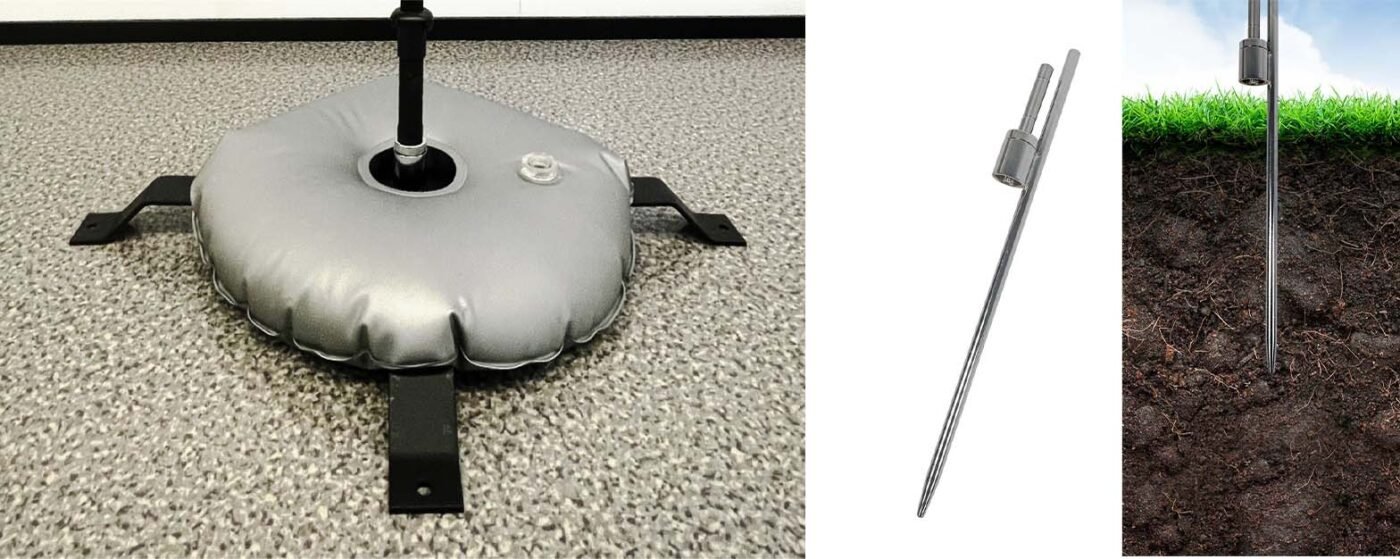
Securing the Feather Flag
If using a ground stake, firmly push it into the ground, and then mount the pole onto the stake.
For a cross base, ensure it’s lying flat and stable before attaching the pole. You can add extra stability with water weights or sandbags.
Final Adjustments
Once your feather flag is set up, take a step back and observe. Make sure it’s fully extended and the fabric is not tangled or wrinkled. Adjust the tension if necessary to ensure the flag displays your message clearly.
gostei muito do seu site parabéns. I like so much your
website, verygood content. i will follow you 🙂
Guten Tag! Deine Nutzung von Farbsymbolik in deinem Blog-Design ist auffallend. Könntest du mehr darüber erzählen, wie du Farben auswählst, um eine bestimmte Stimmung oder Botschaft zu vermitteln, und ob es bestimmte Farbkombinationen gibt, die du bevorzugst?